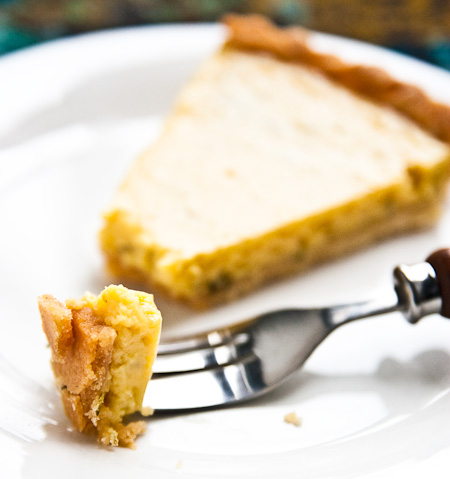
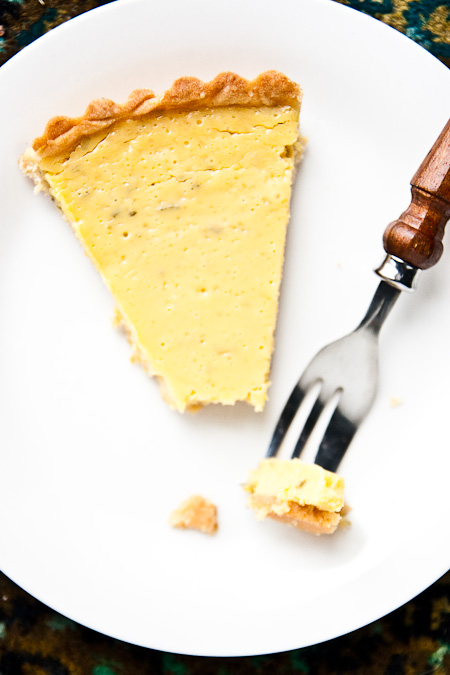
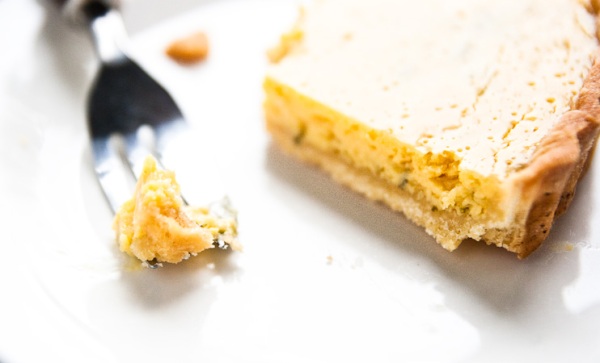
Lime tart, for those who embrace tartness.
…balanced with a healthy dose of sugar. Plus some butter.

…and lime, of course. Not that you can tell from a distance, which makes it that much more zest-er-iffic when you dive into it. I even joked that it looked like a cheese and chive tart (which actually is not a bad idea at all), with the lime zest immersed in a happy yellow. If you’re not keen on other people making jokes about your baking, you could always use lemon zest instead, and turn this into a secretly-lime-and-lemon tart. I’ve been having a lot of lime recently thanks to my stash of raspberry lime granita, so I felt like this was a lemon and lime sort of affair anyway, but friends said the lime flavour was punchy enough, so tell me what you think if you make this.

Now for the useful “what does this actually taste like” part of this episode. Unlike a lot of eggy fillings, this one keeps its glorious shape and is far sharper in flavour as a result. It is super sweet and super limey, smooth and creamy, the best citrus tart filling I’ve ever tried (makes me love The Pioneer Woman even more). This I think is to do with the simplicity of the ingredients: just lime juice, zest, sweetened condensed milk and two egg yolks. I was at first worried it would just taste like sour sweetened condensed milk, because it kind of smelt that way before cooking, but didn’t detect it in the final product. The citrus just takes over. Phew. You can also make lemon tart into squares/slice if you want to make your life easier – Gerlinde at Cooking Weekends has a great post on this, albeit using a slightly less tart lime topping recipe.
The crust deserves its own novel paragraph, because I’ve got very fussy specifications for tart crusts. They have to be thin (at or under 3 or 4 mm, or around 1/8″) and therefore crunchy (not just hard); buttery without stealing the show from the filling, and never ever soggy. If they don’t satisfy all these criteria I feel like the tart is a not worth the time (and time they do take if making the crusts from scratch, but it is SO worth it when you get it right). Obviously there are exceptions – I love thick crunchy crumb based tart shells (like the base of cheesecakes)! However, the best tart shell that encapsulates the crust of my dreams is still Fanny’s vanilla bean pate sucree, but the only ground almonds I had at the time made everything they touched taste like curry. Don’t even let me get into that. For this tart I figured Dorie Greenspan and Deb from Smitten Kitchen could not lead me astray, and I finally tried the famous “unshrinkable” pie tart. Of course, with my specific demands, and because I decided I’d make it half as thick, the recipe ended up involving a lot more drama than my dream of simply using half the dough and rolling it thinner. There was far more swearing and banging and re-rolling and tearing and despair, but it’s ok, because there was also eureka and success and a new discovery and crust perfection. Also, unshrinkable is in “”s because mine actually shrunk quite drastically (apparently this happens if you roll the dough out and everything is still too warm), but I just shrugged because it was still the perfect size for the filling (which was actually meant to be for a smaller tart).

So after all that crust drama, I’d like to apologise to the crust for calling it the names I did, because it turned out delicious and amazing even though I rerolled it with copious amounts of flour in my warm kitchen. And while it looks a little dry and tough in the photo above, I promise that’s just my poor choice of lighting (I just wanted to eat the damn thing already…again…because this was my second slice…). Also I wanted to make the original biscuit crumb crust but was too lazy to make a dedicated trip for biscuits.
Lime-a-licious tart
makes one 9″ ish thin tart – so you can have massive slices if you want ;) Use a 10″ tart pan with removeable base to allow for shrinkage, otherwise you will have leftover filling.
Crust (makes enough for two)
- 1 1/2 c plain flour
- 1/2 c icing sugar
- 1/4 tsp salt
- 113g very cold (or frozen) unsalted butter, cubed
- 1 large egg
Grease the base and sides of your 10″ tart pan. Pulse first 4 ingredients in a food processor until there are no butter lumps larger than pea sized. Pulse in egg until large clumps of dough form. Tip mixture out onto a lightly floured work surface and shape into two balls with your hands. Flatten into discs, and cover in plastic or place in a plastic container. Freeze one to use for another use. If the other disc is still cold to the touch, you may proceed, if not, refrigerate while you make the filling.
To roll out, I’ve tried both these methods and they work:
- Roll the refrigerated disc out on a piece of flour-sprinkled baking paper until it’s large enough to touch the edges of your tart tin. Upend the baking paper into the tart tin and peel paper off so that the crust sits in the tart pan. Now use a straight edged glass (with a 90 degree angle between side and bottom) like a rolling pin and roll the dough from the centre to the edges, so the edges are thick. Use the base and edge of the glass to flatten the thick edges down and out, squishing the dough up the sides of your tart tin. Use the edge of the glass to help you achieve a nice 90″ angle for the bottom and side of you crust. Of course you can try another method, this is just the way I had success with my tart, as neat as I could without special equipment. Trim off excess edges (you shouldn’t have very much at all with this method).
- Place a perfectly flat baking stone in the freezer for 30 minutes prior to rolling (good if you’re defrosting dough from a previous use). Roll the refrigerated disc out on a piece of flour-sprinkled baking paper until it’s large enough to touch the edges of your tart tin. By now it will be quite a bit softer. Bring out pizza stone, place dough + baking paper on the pizza stone, and continue rolling until the piece is large enough. You can use the base of your pan and place it gently over to see if it’s big enough. Place pastry circle non baking paper side onto the base, then flip upside down into the tart ring. Place the whole setup on your cold pizza stone. Peel the paper off carefully, then use a glass to ease the dough into the corners of your tart tin. This needs to be done fairly quickly before the dough starts getting funny ideas about going all soft again. Trim and tidy edges.
Place pastried tart tin in freezer for 30 minutes.
Filling
- 1x 400g can sweetened condensed milk
- 1/2c freshly squeezed lime juice (you can add a bit of fresh squeezed lemon juice if you run out of lime juice), about 5 limes if you really squeeze em good
- 1 Tbs lime zest
- 2 egg yolks (freeze the whites for another use)
Whisk all ingredients until uniform. Set aside until crust is ready.
Baking
Twenty minutes before your crust can come out of the freezer, preheat oven to 180C (355F), with a rack centered. Once crust is ready, bake for 10-15 minutes until the base puffs up. Remove from oven, fork the puff lightly (not all the way through the entire crust, only the top bit), and press down with the back of a spoon or fork. Return to oven for another 7 minutes, until the crust is nicely golden around the edges and there are golden splotches in the middle bit. Cool on a rack completely (about 20 minutes).
Pour the filling into the crust, then return to oven for 15-20 minutes until the filling is just set and doesn’t wobble when you shake it lightly. It will also have some dimples and look like the mixture is simmering slightly. Cool completely, then refrigerate at least an hour before eating.
Some serve this with things like whipped cream to balance the sweet tartness, but I like it on its own in all its uncompromisingly flavoursome glory. Enjoy!


I love citrus tarts but usually make lemon but we seem to have a lot more limes around this year so a chance to make a lime one I think.
Finally limes have started to come down in price a bit around these parts and I do love a good lemon or lime tart. Have never made one with sweetened condensed milk – sounds gorgeous. But chive and cheese! Now there’s an idea :D
Came across your blog a week or so ago and made this tonight! Delicious and the crust was awesome!
A: We found some cheap Australian ones, which I suppose is closer (maybe also therefore fresher?) than American limes. They’re not very juicy at all though, not sure if that’s a universal lime trait!
M: The sweetened condensed milk actually gives it an amazing texture. It smells kind of awful though, but it doesn’t come through in the final product thankfully!
A: Yay! Glad the crust did work for someone else as well. I’ll be making another one (my partner loved this tart so much her bought 2kg of limes…) so will update if I find a shortcut for rolling out the crust. Thanks for letting me know how it went :)
Love citrus tarts…the tarter the better.
M: Yeah, otherwise what’s the point, right?
This looks amazing! I’m so glad the crust turned out the way you wanted – sometimes a little swearing goes a long way =)
So random, but how awesome is that fork?!
P: Haha, I wish my flatmates thought the same! Fortunately they don’t complain much since I share a lot.
S: Very! I picked up a set of three for next to nothing at an op shop, along with a whole bunch of other cutlery I didn’t really need. That said our cutlery drawer is never empty now.